NaN:NaN
NaN:NaN
--:-- / --:--
Newgrounds Background Image Theme

Casval9 just joined the crew!

We need you on the team, too.

Support Newgrounds and get tons of perks for just $2.99!

Create a Free Account and then..

Become a Supporter!

Nothany's Behind the Scenes Tips & Tricks

642 Views | 13 Replies
New Topic Respond to this Topic

This thread aims to cover some stuff I've learned while doing a few of my projects. Not sure how often I'll update this thread or how much I'll go in depth with this (plus there's also the "Drawing with Bob" comic series)


Point is: I like teaching the stuff I've learned to others, and this thread allows me to quickly talk about it without muddying the news feed every time


I'll start-off this thread with an old, but still relevant tip I posted in my news thread. A couple of them will be like this for now, but who knows, I might make some comics for the tips I like the most.


~~How I Draw Eyes~~


When drawing eyes for the first time, or drawing eyes you're not familiar with what often happens is that you'll draw one eye correctly, and the other eye will look off in some way. Be it misaligned, or it just doesn't match the other eye.


So how do you fix this? Well, what's something that's easy to draw and hard to screw-up? SHAPES!


iu_715880_9884366.png


Every eye can be broken-down into simple shapes, like a triangle, square, circle, or oval. This is your foundation. It's quick to draw, takes a second to tweak if it doesn't look right, and you can easily mould it around any surface. Basically, If the shapes look the same, then the eyes will look about the same.


Next you draw your eyes around those shapes:

iu_715881_9884366.png


These shapes now become a guide for you as you draw your eyes. Now you can see when either eye is off because those shapes are helping you concentrate in small areas instead of focusing on the entire eye at once.


Next you remove the guides:

iu_715882_9884366.png


Pretty solid looking eye sockets right? One thing to keep in mind is that even with these shape guides, there are occasions where the eyes still need to be tweaked a bit, and that's normal.


The last step is to just add the details and the pupils:

iu_715883_9884366.png


[NOTE: I changed the eye sockets at the bottom a slight bit to make the pupils look better]

And there you go! An easy and consistent way to draw eyes.


If you want more little eye tricks you can look at this comic I've made that details how to express emotions with eyes, and how the eyes of a character can also define their personality


Hope you've learned something!


BBS Signature

On the topic of eyes, I might as well share the evolution of some of my eye designs

iu_903424_9884366.png

The first eye design I've ever done were these little lines for eyes that were easy to draw and can do a ton of emotions. These aren't all that original, pretty much everyone uses them when you start-out as an artist, and I still use them to this day because they're just so effective at their job


After a while of drawing this same face I wanted to try-out different styles for the hell of it. It gave me an idea what sort of eyes I should try to do in the future

There was another eye design that predates this whole challenge I did, but that's a story for another time


One pattern that I would notice immediately was that I didn't like circular pupils or eye sockets. Kinda gave me this fake plastic-y vibe, and it felt a little limiting in a way as you needed to constantly make the characters cross-eyed in order for it to look good.


And so, a few days later I decided to experiment a bit more with eye designs until I found my first proper eye design


From there the eye design would stay relatively the same until one day where this happened

iu_903426_9884366.png

The way I'd draw the eye before was I'd draw the bottom half first, then I'd draw the top half. But what kept happening was I'd constantly draw the bottom half too long and it was always a pain to erase the little extra bit of line (keep in mind, I was using paper)...so I just left it there one day. Looked cool for me at the time...now I just find it weird looking.


Days go by, and the eye design starts morphing into something else as I design a proper character to go along with it

iu_903425_9884366.pngiu_903428_9884366.png

[yuck! I hate looking at these pics now. How did I ever think these looked good!!]


Didn't really know what I wanted for the eyes, really the closest thing I could think of was making the eyes have the same shape as car headlights...in hindsight I don't know why I thought it would look cool, I just did the eyes because "it's original and cool" without putting that much thought into it.


Eventually when I started using my drawing tablet to draw, I'd make another mistake with these eyes that would stick for a good while

iu_903427_9884366.png

Basically with the drawing tablet I'd sometimes accidentally touch the screen as I was trying to draw the little nub looking thing which would make it have this little swirl to it which ended-up looking, so I kept it.

[Still kinda does in this weird Egyptian looking way...too bad it didn't look all that good on the human characters]

iu_903429_9884366.webp

I even kept this little swirl when I created all my other characters (minus Bob since I wanted to keep him simple) as this sort of "signature style"


I did try to see if I could make it look better with Holrad. More or less passing the torch to him, as I wanted to redesign the human character to not look horrible

iu_903430_9884366.png


But in the end I just dropped it entirely because I knew animating that thing would be a pain to get it consistently.

iu_903431_9884366.png


Nothany also got new got brand new eyes that fit him a lot better now and even matches his personality

[pretty much everything changed after I studied and drew Felix the Cat. Cartoony exaggeration was what I was looking for, and I got it in spades with Felix]

iu_903432_9884366.png


I did try to see if I could get away with more wild eye styles for Nothany after I was inspired by Picasso for Lunaic's new eyes, but they'd always end-up looking way too weird when I'd try to put the rest of the face around it or it wouldn't fit Nothany's personality. So I just put them aside in case I have another character that could benefit with these eyes.

[Most likely another female character or an alien character]

iu_903433_9884366.png


And that's pretty much the entire evolution of Nothany's eyes. Bit of a weird evolution, but maybe one that's not too dissimilar to some.


I don't know. I just like to recount some little discoveries I've made over my years of learning how to draw.


BBS Signature

~~Avoiding Problems Behind the Scene~~


You know, for a project named "Avoiding Problems" I sure did encounter a ton of them while making it. Learned a lot with this one, so I might as well write these little things down. Both for myself, and for the ones still learning.


Funnily enough, the idea for this project came from me dicking around with Blender. I wanted to experiment with rigging, but I didn't want to make an overly complex model just to have it not work with the armature, so I kept it simple by using Tri-bot...


...this turned-out to be the worst idea


So Tri-bot's gimmick is that she's made of triangles...like completely...like literally everything on her is a triangle, even down to her individual body parts being made of triangular pyramid.

iu_996157_9884366.webp


Blender (and any 3D modelling program for that matter) use quads (AKA: squares) for modelling, and not tris (AKA: triangles) which from the get-go I knew would cause problems...


...and cause problems it sure did!


iu_996158_9884366.png

So modelling Tri-bot was already a bit annoying since I had to force Blender to make a triangular pyramid, but once that was done it was just a matter of copy-pasting the same shape like 30 times (34 to be exact)


iu_996159_9884366.png

Once that was done it was time to add the materials to give Tri-bot her "signature" emerald green colour


iu_996160_9884366.webp

Though, not before making her ultra-realistic first (always imagined her as this robot made of emeralds for some reason). I even made her eyes emit light, so that you can see them even if it's pitch black


For the toon-shading I decided to follow this tutorial, and I got my answer at around the 13 min mark

https://youtu.be/hBztmFHkNQo


iu_996161_9884366.png

One small problem though...remember how Blender likes quads more than tris? Well because of that I couldn't do the outline thing the guy does at the 19 min mark. The Solidify modifier just doesn't like the overly simple triangle design and would bug-out by not even showing the model or show it upside-down


So what did I do to remedy this? Well...

iu_996162_9884366.png

I made a sort of cage that goes around every body part on the model. All made from thin but wide strips of polygons and painted it in a pure black material. The result is this incredible looking lineart that I can even tweak per-body part basis, so I can tweak the look to my desire in the few angles where it looks bad...

iu_996163_9884366.png

...and it's all thanks to this weird but effective cage I put around each body part...

iu_996167_9884366.png

...all 34 of them ;_;


Rigging was up next, and it was the most tedious thing I had to do because I had to manually parent every piece of this model (all 34 of them) to their respective bone.

[makes you wonder how they rigged something like Knack.]


Also, PRO TIP: Make sure you apply all transformations before rigging! Not doing so resulted in pieces of my rig flying everywhere as I was trying to rig the model.

iu_996168_9884366.png


Though, I never used this rigged version for my project, and it's all because of a simple and stupid mistake...


...You can't parent a bone when you only select the tips of each bone. You have to select the entire bone for that to work.

iu_996166_9884366.png

It's such a simple little thing to overlook, yet I both didn't find anything about online AND I was an idiot who didn't think to try selecting the entire bone.


Though, posing the "boneless" version model wasn't that bad. Parenting each body part to one another more or less mimicked the rig anyways. The only difference was that the pieces would all rotate from the center instead of rotating at the edge of it


BBS Signature

~~Dimension Duo Behind the Scenes~~


So, this drawing is just my usual all vector drawing that I do on occasions when I want to design something for printing, and not bother measuring. All done with Krita's terrible, but still comfortable to use vector tools (yipee!)


Though, I have to tell the story of how I made that trippy looking portal effect. Because it's a cool combination of a bunch of softwares that all did one job really really well. And one that was being a little bitch about it the whole way through.


So the first thing I tried doing with the portal was I tried sketching a few lines manually to see if I could make this wavy effect...that didn't work all that well. All my lines were just too organized and it looked more like a lava-lamp instead of water.


Then I got the brilliant idea to use Blender since it can easily make trippy looking noise textures on the fly that I even used for my 3DS collab entry (not released as of writing)

iu_997494_9884366.webp

So I made this basic scene with a flat plain facing right at the camera


iu_997495_9884366.webp

Then it was a matter of inserting the noise texture, adding a colour ramp to limit the colours (vectors aren't good with gradients, and I wasn't using them to begin with, so I went with an "all or nothing" approach), cranked the world's light so the it had a good contrast, and turned-off the specular on the material so the light didn't mess-up the colours.


[There might be a way to extract the texture without doing all these steps, but for now this is how I did it]


Then it was a matter of exporting the thing to Krita. Only one problem though...the image was raster, not vector, and vector is what I wanted. What to do...


...I originally tried drawing it all by hand, but after looking at the sheer size of it all, I decided to look for alternatives


So I dug around Krita looking for a way to see if it could convert things into vectors...and turns-out it can! Any selection can be converted into a vector shape!


That's amazing! So I took my magic wand tool and highlighted the entire region, and hit "convert to shape"

iu_997496_9884366.webp


Though, later on I realized something something that pissed me off...

iu_997497_9884366.webp

So Krita did convert my selection into a vector shape, but Krita can't round-off any of the corners (even with the anti-aliasing option turned-on) resulting in this pixelated looking vector mess. This pretty much turned this potentially good tool into a something that's completely pointless. What's even the point of turning any selection into a vector shape if it's not going to at least round-off the edges!


Back to the drawing board I went, was kinda stumped for a bit trying to see what I should do. Then it hit me, INKSCAPE! Inkscape was another vector tool that I had laying around, so I went digging into every setting in Inkscape just to see if it could convert a bitmap file into a vector, and low and behold...

iu_997498_9884366.png

...BINGO!


And would you look at that! No pixelated edges!

[The OG pic is still shown under the vector mesh]

iu_997499_9884366.png

It's not perfect, but by god is it 100 times better than anything Krita did with its tools.


So now I had to drag the newly made vector file into Krita where it acts like a vector layer, but you can't edit it even though Krita uses the same basic code as Inkscape (thanks Krita, that's one more thing to add to the list of things I hate about you)


Finally, the result I was looking for! So to recap, here's the entire process I had to go through just to make that portal effect:

iu_997500_9884366.webp


Such a tedious little task to do just to have a simple little vector effect in a drawing. Now I'm curious if Inkscape is better at doing simple vector art compared to Krita.


Eh...time to add another one to the pile...

iu_997501_9884366.webp


BBS Signature

~~~Killer Cat Behind The Scenes~~~


Learned a pretty good trick with this one that made the whole process take a lot less time to create, saved a lot more space, and still looks as good as if I had done it all manually with vectors.


To start, my biggest gripe with every program that has these pressure-sensitive vector pens is that they're not sensitive enough (Inkscape, Opentoonz, Pencil2D, and Blender). The thick areas are always captured well enough, but the spiky tips are never translated well no matter how gentle I am with the pen sensitivity.

iu_1003885_9884366.png


This isn't so bad for most who like to keep a consistent lineweight, but I love going all over the place with mine so it gets pretty annoying having to constantly tweak these vector lines all the time, and the result is almost never the same (it also takes-up more space than just a regular vector shape)

iu_1003886_9884366.png


Then I got a brilliant idea! Why don't I just do my lineart in Krita, export the layer into Inkscape, and make Inkscape trace the thing for me. That way I can easily tweak the lineart to my liking in Krita, then make Inkscape take care of all the heavy lifting for me.

iu_1003887_9884366.png


Looks nearly indistinguishable from the original!


Now Inkscape isn't the most optimized when it comes to tracing vectors when compared to yours truly (even with the optimize slider maxed-out)...

iu_1003888_9884366.png


...And Inkscape really loves to round-out the spiky edges ever so slightly which bothers me slightly (but not enough for me to change them)

iu_1003889_9884366.png


But overall this trick is so freaking useful for me, as I love how easy it is to tweak rasters compared to vectors, and taking care of the lineart like that saves so many headaches on my end. It's also way more space efficient too.


This one's svg file is about 80KB, and I manually drew the lineart in Inkscape


And this one's svg file is only 11KB, and I made Inkscape trace the lineart


Massive difference, easier to work with, and looks better to boot!


A real work smarter, not harder situation.


BBS Signature

It's misleading for krita to call their 'vector' shapes vectors. It's not a vector really, it's still raster in the end, just allows you to utilize mathematical points rather than bitmap pixels. Never rely on krita as an alternative to inkscape, inkscape was designed for vectors. Vectors in krita was mostly an afterthought if I recall.


At 6/24/23 04:50 PM, lwpage wrote:It's misleading for krita to call their 'vector' shapes vectors. It's not a vector really, it's still raster in the end, just allows you to utilize mathematical points rather than bitmap pixels. Never rely on krita as an alternative to inkscape, inkscape was designed for vectors. Vectors in krita was mostly an afterthought if I recall.


Vectors in Krita was always weird when I used it because as you said they're neither vector or rasters, and it makes sense that it was an afterthought because you can't draw vectors with pressure sensitivity, you can't you animate with them (for some weird reason), it also slows-down Krita a lot when you make really big shapes since Krita needs to convert the thing to a raster every time you move it, and so far Krita has mostly crashed when using these vector tool (though, it's like once in a blue moon)


Still, these vector layers can be exported into an SVG file (which I did use a few times before to send vector drawings to others), and I often use vector shapes in my drawings for colouring since they're easier to tweak the colours compared to using the fill-bucket.


But yeah, now I've more or less completely transitioned to Inkscape for my vector art because Krita made me mad, and despite the worse UI it's actually a way more powerful tool than I expected, and I want to see how far I can push it.


Sorry for my long rambles, I do that a lot


BBS Signature

At 6/15/23 12:02 AM, NothanyTPM wrote:Blender (and any 3D modelling program for that matter) use quads (AKA: squares) for modelling, and not tris (AKA: triangles) which from the get-go I knew would cause problems...

...and cause problems it sure did!

So modelling Tri-bot was already a bit annoying since I had to force Blender to make a triangular pyramid, but once that was done it was just a matter of copy-pasting the same shape like 30 times (34 to be exact)


Triangles or quads make 0 difference on shaping of an object, so making a pyramid out of quads (or triangles if you want to)is not a Blender issue. More so you can combine your modelling with sculpt to get better and detailed shapes.


As Bender user, I must admit - i understood absolutely nothing about - what was your problem with blender exactly regarding making this figure or 2D aspect of it.


I use Blender to do objects (backgrounds, more complex weapons and elements) for my current doodle project. To make Blender do line art (or use vector mesh curves if you want to make it better) - you do not add separate mesh-object like you show in one of your screens, you make a cavity or proper normal map later, and then blender knows where object depth is and so it does all the rest for you - even those aspects you go into Krita on later 'tip'.


Just do quick makeshift texture/material in Blender nodes, bake it and then you have object you can resize, re-render etc etc and do not need static 2D vectors as you'd already have 3D vectors. And using transparency option, you can make easier repeatable asset-input for a comic for example. It is technique many manga and comic artists use by the way.


Or shorter version : You can do all what you aimed to do, within Blender and ... with much-much less hassle.


As for rigging part, while I use autorig (which is paid mod), you can just also either user riggify template or Reallusions or Adobe free rigs which would detect the shape of your triangle character alike. This way you'd also have less hassle with tips, IK settings and all that.


Blender allows you to do vector drawings as well which there are least 3 or 4 options - the pen, the curves or geometry nodes or camera-view-port curves (as of Blender 3.5).


I must confess, I'm still a noob at Blender. Still learning the ropes with it after trying to use it sometime at the beginning of the year, so there's still a lot to learn.


Some Blender pros like yourself may wince at the decisions I made while making some of my models and whatnot, and for as much as this is a "Tips and tricks" forum, it's also a forum for behind the scenes stuff that would be WAY too long and boring to put in my art descriptions. Hence why this exists.


Triangles or quads make 0 difference on shaping of an object, so making a pyramid out of quads (or triangles if you want to)is not a Blender issue. More so you can combine your modelling with sculpt to get better and detailed shapes.


Yes and no. For normal modelling it makes no difference, but it can screw-up a few modifiers that play around with the model's shape like the subdivision modifier.


A great example is with the default cylinder. By default it has a triangular mesh for the top and bottom of the cylinder, and subdividing it will turn the cylinder into a Squished sphere.


But if you replace those tris with quads then you won't have that problem and it'll keep its shape no matter how many times you subdivide it.


Now I wouldn't use subdivision on the character I rigged, but the modifier I was trying to use (solidify) relied on modifying the model, and Blender did not like that one bit because the model was too simple for Blender

[you should try it and see for yourself ;p]


you do not add separate mesh-object like you show in one of your screens, you make a cavity or proper normal map later, and then blender knows where object depth is and so it does all the rest for you


Could you show me some sort of tutorial please? I'd love to know how creating a cavity and making normal maps have to do with drawing lineart.


So far I've only seen tutorials that use the solidify modifier...

https://youtu.be/qs4QUGKm6XU

...Which doesn't work because the model is too simple


And one which uses grease pencil...

https://youtu.be/4BxL_XrcJrU

...Which also doesn't work because grease pencil (as far as I know) can't make sharp angular lines, which doesn't look good on an angular character like Tri-bot


Just do quick makeshift texture/material in Blender nodes, bake it and then you have object you can resize, re-render etc etc and do not need static 2D vectors as you'd already have 3D vectors.


And now we're baking?! Dude, I don't need to bake any shadows and texture. The bitch is made of flat triangles that turn one of three colours depending on the side its facing! I can and have done it myself before. It's not that hard.


WHAT DOES THIS HAVE TO DO WITH LINEART?!


plz, m cmfsd ;_;


As for rigging part, while I use autorig (which is paid mod), you can just also either user riggify template or Reallusions or Adobe free rigs which would detect the shape of your triangle character alike. This way you'd also have less hassle with tips, IK settings and all that.


Actually pretty good tip. Will keep that in mind.

[Not sure how many times I'll do this kind of model though]


If you haven't gotten it yet, I for the most part have no clue what you're talking about when it comes to your lineart tricks, and would love it if you gave me some kind of visual tutorial on how its done so I can improve this model in the future.

[Though, I do like how it turned-out regardless of how "inefficient" it might be]


BBS Signature

~~Clean-up Time! Behind the scenes~~


Boy, where to start with this one...


...this is the story of how this stupid joke animation became the most hated thing I animated (so far).


~~>The Sketchy Beginnings


It all started way back in the 2022 Sketch Collab. Had this funny idea to make this super smooth and well made animation...of my rabbit OC moping the floor (which was partially a reference to the talent show episode of Spongebob). In my mind it was the perfect little animation project to start with since it was short, simple, and would allow me to see how good my animation skills were at the time.


30 days later and I still wasn't done with the animation...this looked bad for little 'ol me, but luckily the Sketch Collab's deadline was extended and after working on this little animation for a total of 45 days straight, it was finally complete and ready for the Sketch Collab...


iu_1009546_9884366.gif


...Now to polish it...


The app I was using to create this animation was Pencil2D. A very simple, but very competent app that's quick to learn and helped me make this in a pinch. However, there were two problems I encountered:


For one, the vector tools in Pencil2D are god awful. 80% of the time they don't work like you'd expect (compared to Krita, and Inkscape), and would crash the program a lot

[I want vector tools because my laptop isn't strong enough to render raster animation beyond 1080p]


This drawing I made for example took me a month to make in Pencil2D all because the fill bucket tool wasn't working

[For comparison a normal vector drawing takes me 3 days at most to complete]


And secondly, shortly after I completed the Sketch Collab my SSD in my laptop died, losing the original file (and a few other files that I hadn't backed-up in time). Luckily the gif file I had sent for the Sketch Collab was still safe and sound, but this deterred me from polishing the animation right away.


~~>Taming the Right Program


The hunt was on to tame the right program to polish-up the Sketch Collab animation.


From the get-go, I knew Krita and Pencil2D wasn't going to cut it. Krita could animate, but you couldn't animate using the included vector tools (one of Krita's many double standards). And you already know what I think about Pencil2D's vector tools.


Couldn't use the popular options like Flash or ToonBoom because I'm using Linux, and not Windows or Mac.


Most of the other Open-source apps were just as if not more unfinished than Pencil2D with them either having a worse UI, or were unable to properly install.


The only two that even stood a chance at potentially animating my little animation were Blender (a 3D modelling app with a 2D animation tool recently implemented), and Opentoonz (a 2D animation tool with the most confusing UI I've ever seen).


Out of the two I decided to tame Blender first because it meant I'd learn both 2D and 3D all at once.


~~>Gluten for Punishment


Blender had a bit of a learning curve when it comes to its UI. It's made for 3D first and foremost, and the controls reflect that. Taming it was just a matter of learning what the most important hotkeys were, and understanding how the app organizes all its tools.


Learning the hotkeys in Blender was a bit of a challenge, mapping each of them to my tablet's 8 shortcut keys and scroll wheel was worse. It took so long until I got the perfect combo, and even then I still need a keyboard at the ready for some of these hotkeys I couldn't easily map. I also needed to dig through menus just to find how to access the same feature without using the hotkeys just to see if it was even worth mapping.


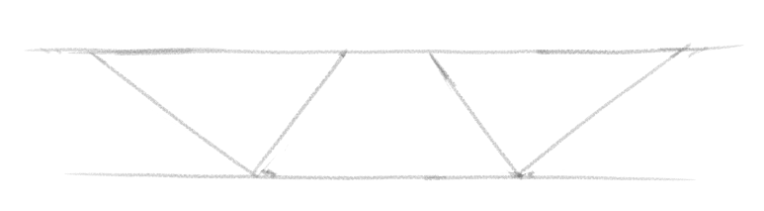
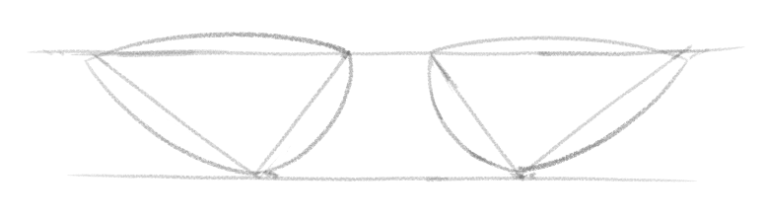
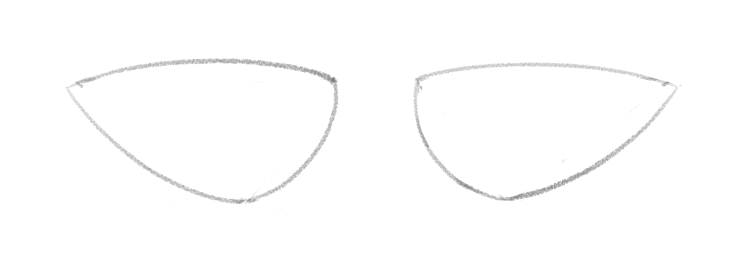
Throughout learning Blender I've made these drawings


Very quickly, I found a problem while making every single one of these. The program was struggling to run on my old Thinkpad T530. Blender is very power hungry even for the simplest of projects, and this poor Thinkpad just couldn't handle it with its piss poor CPU and GPU. This made the experience very laggy which is bad when your main goal is to polish-up a 48 frame animation.


No matter what I did (offloading the sketch into Krita, using less layers, simplifying the drawings) it did nothing to mitigate how powerhungry Blender was. I even tried using my old Core2Duo machine as a last ditch effort to see if it would make any difference (since it had a better GPU then my Thinkpad)


The result: 3D modelling was better...but anything 2D was way worse. Turns-out digital drawing is more CPU intensive then I originally thought (and even then, 3D modelling was pretty hard on that machine after a while)...


...So I was left with only one option...


~~>Taming the Untamable Beast


OpenToonz was a program many feared because of how utterly confusing its UI can be at times. It was the main reason why I squandered-off into Pencil2D, and Blender. Anything was better and easier to learn then OpenToonz.


However, now I needed to face my fears and brave the beast if I wanted a chance at polishing this silly animation...


...It was time to learn how to save a project in OpenToonz

[Seriously, why is saving in a custom location so needlessly cryptic in OpenToonz?! Who hurt you OpenToonz?]


Learning OpenToonz was a difficult ordeal, nothing made sense, and my tablet barely worked with it for some reason [until I found a "make tablets work" checkbox in the preference menu...why is that needed?]. Saving in a custom location requires going to the preference menu and adding the general directory you want it to save, there's no way to save brush presets (you just need to memorize all of them), and there's so many shader settings and tabs that it would make Blender blush...and Blender's a 3D modelling program!


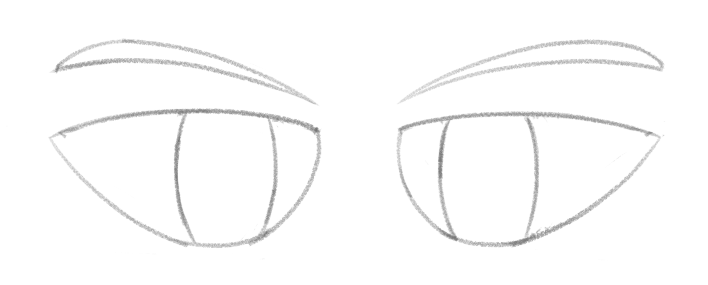
Regardless, after looking at a few videos of artists using the software (mainly this one), I more or less learned enough to get by the basics and made this


I like making drawings in animation programs because it allows me to test a bunch of tools and potential problems all at once without needing to waste time making a simple animations that would take me weeks to make.


So, after making the drawing, and learning a lot from the program, I still shied away from the program for a good bit due to it still being difficult to use. Though, I had to swallow that tough pill eventually as I had a lot of other animation ideas I wanted to animate, and this unfinished mopping animation was the only thing keeping me from doing them.


I started animating at the beginning of the month, but I wanted it done by the end of the month. Let me tell you, it's really tough to animate something you don't want to animate, and I had to crunch it out in the end because I kept getting distracted with other things like learning how Inkscape works, and my birthday drawing.


And with all that said, I'm both happy, and relived that I managed to finally complete what I had started a year ago. I may not have completely tamed OpenToonz, but now I can start doing more animation projects without that stupid mopping animation haunting my mind constantly as I work on other projects...


...Though, I still have that Klonoa drawing that's also haunting me. Guess these things never end do they.


[Also, fuck me what did I do this time?! I just blacked-out and wrote an entire video essay script! Nearly reached the character limit too! WTF!]


BBS Signature

At 6/25/23 02:40 PM, NothanyTPM wrote:I must confess, I'm still a noob at Blender. Still learning the ropes with it after trying to use it sometime at the beginning of the year, so there's still a lot to learn.

Some Blender pros like yourself may wince at the decisions I made while making some of my models and whatnot, and for as much as this is a "Tips and tricks" forum, it's also a forum for behind the scenes stuff that would be WAY too long and boring to put in my art descriptions. Hence why this exists.


Hey, your model was nice - I liked the shape and all this. Do not get me wrong. It's just sometimes, when i post in mornings after waking up my English is a bit more 'angrier' sounding because of my 1st language and direct translations makes sentences more distinctive and some find it making me sound a bit more angrier than I intended. So apologies of that.


However you going with "Blender pros" insult combined admitting you are still Blender novice, then proceed to call other user 'wrong' just because a YouTube clip you saw claimed so ?


... hmm. Yeah. Well. If you think you know it better, then who am i to disagree or give advice. Carry on, have fun! It is a beautiful day! Sorry, not interrupting you anymore.


PS! Baking some details helps to have imitation of cavities for better lineart for bigger project - i.e. if you want to do 2D animation using 3d objects. But what i know. :)


~~3D Birds Behind the scene~~


This is pretty much my first time I was working with rigged 3D models that were more than just a bunch of shapes connected to bones, and as you're about to see...it shows...badly


When I started this I was kinda optimistic, but also knew that this was going to take a while to make and gave myself a good head start just in case things went real bad and I needed to start over from scratch.


First thing I did was make a rough sketch of how and where everything was going to be layed-out

iu_1023127_9884366.webp

[I think this entire sketch took me about 15-30 min if I remember correctly?]


Next step would be to create the camera and vinyl record. Those two were super easy to make.


Using topology tricks I found from this guy's YouTube video I was able to quickly and painlessly create these 3D models using nothing but the bare minimum amount of polygons, and cranking-up the subdivision modifier to smooth things out

iu_1023128_9884366.png

iu_1023129_9884366.png

[I removed the shutter button from the camera when I made the 3D model just because I couldn't find a good colour for the button itself. It just kept clashing with the camera]

iu_1023130_9884366.png

iu_1023131_9884366.png


Incredible how subdividing a few times can give amazing results! Basically turned N64 styled models into something HD with a click of a button.


The birds on the other hand were a bitch to model. Probably because this was my first time modelling a character, and of course the first one I'd do would be of an animal that I didn't know the proper anatomy of, so most of what I modelled came from looking at birds and the sprites of the 3DS birds. Modeling the wings was the worst part, as it was super awkward to work with on the model, so I detached it from the model, and then it became a bitch just to put it back on the model.


And here's the glorious bird model I made...well, one of 3

iu_1023132_9884366.webp

iu_1023133_9884366.webp

iu_1023134_9884366.webp


See, making the wings was already tough enough on its own...making them fold was straight-up impossible for me with the way I modelled them. The legs also didn't want to cooperate with the skeleton I made, so for the other models I just cut off part of the legs just so I could get this thing done without remodelling or spending a week learning how skeletons work

iu_1023135_9884366.png

[Was so sick of modelling everything that I even made the folded-up wings separate objects just so I didn't have to deal with figuring-out how to properly attach them without screwing-up any quads]


And for the face I cleverly put a few flat polygons with a shrinkwrap, mirror, and subdivision modifier so that it would look like a texture on the bird's face.

iu_1023136_9884366.png


Lighting was done with a single sun to keep things consistent (and in a way very "retro" feeling). The shading was kinda cool as I essentially used a colour ramp to change the light and dark values to whatever's on the ramp, giving me full control of what colours are used for each material.

[The technique use is identical to the one you use for toon shading except you keep the values as a gradient]


And finally the background was done with 3 basic flat planes: one was white for the background, and the two others were stretched, used a noise texture with a bit of distortion tied to the base colour, and an spherical gradient on the alpha channel.


All and all this was a really tough one to work on (though currently the next 3D project I'm working on is arguably worse), but I adore the 2000s looking results. It's so cool looking!


BBS Signature

~~Simple Birthday Behind the Scenes~~


So, as the title implies this was meant to be a simple birthday drawing compared to last year where it took me a whole month to draw and I missed the deadline


In many ways it was simpler, but in many ways it was also way harder than last year. Most of it was because I had to create a 3D environment which I thought would be simpler than calculating everything manually like I did last year (and it still kinda is), but it's creating the damned thing was so freaking exhausting.


This took me a whole month to model (I started sometime at the end on June BTW)

iu_1060276_9884366.webp

[I took-out the ceiling so you can see it better]


And here's what still needs to be modelled

iu_1060277_9884366.webp

Just looking at it makes me exhausted


You're probably asking "why are you modelling an entire house when you only needed to do one room?", and the basic answer is that I want to be able to reuse this place over and over again either as a reference, or to make quick backgrounds....I also I just legit thought 3D modelling would be easy...it's not...it's also tedious.


So, throughout the entirety of July doing nothing but modelling what did I accomplish?


I created the foundation for the living-room/dining-room (didn't have enough time to model the chairs and table)

iu_1060278_9884366.webp

[Ignore the weird tile on the floor, that's going to be for something I didn't model yet]


Originally the camera was going to point at this angle instead of towards the kitchen...but I modelled the kitchen even though it wouldn't even be in the shot. In the end it looked nicer with the camera aimed towards the kitchen anyways, so I didn't completely waste my time

iu_1060279_9884366.webp

[At least modelling part of the living-room/dining-room wasn't all in vain as it made the shadows more accurate]


I modelled the entire hallway, but didn't model any doors because none were in shot anyways. Saves a lot of time too.

iu_1060280_9884366.webp

[It was also better to model the entire hallway because things like floorboards are easier to model in one big chunk]

[Also, fun fact: I even modelled little itty-bitty gaps in-between the planks of wood just to add a bit more realism to the whole thing...even if it's usually barely noticeable]


I modelled the entire kitchen. Though, I did cheap-out with the cupboards a bit. Gonna make those look better next time I model the kitchen

iu_1060281_9884366.webp


There's so many details I've modelled in the kitchen that you don't see in the final drawing like the fridge, sink, window, and even the little forest I made in the background which was for another camera angle I had in mind, which looked better for the environment, but I couldn't find a good place for the characters.

iu_1060282_9884366.webp

[Fun fact: all the textures used in this model are mathematically generated. Meaning I was a lazy-ass and didn't spend hours trying to find the right texture online]


Now enough about the model I've spent a month modelling (might make a "part 2" when I complete another part of the model). Let's talk about the rest of the drawing


First thing I did before even rendering the model was I made a few thumbnail sketches (in my usual stick-figure style) just to figure-out what kind of poses I wanted, what angle the camera should be placed, and so on. Even taking a screen-shot of the render just to see if it would work

iu_1060283_9884366.webp


Then it's just a matter of rendering it twice (one with everything, and one with an alpha mask around the counter-top), sketching overtop of it, and pretty much treat it like any of my other drawings. This part was a freaking breeze by comparison. Finished the whole thing on the 13th, so about 10 days before my birthday. Which was almost the opposite last year where I was a few weeks late

iu_1060285_9884366.webp

[The sketch layer of the final drawing]


Though, my method of doing my drawings have changed quite a bit, and in a way is a bit more convoluted, but it gets the results I'm looking for. Basically I sketch and do the lineart in Krita, and then I export all the layers in Inkscape where I make them all vectors (except for the sketch and the background layer), and colour and shade the rest of the drawing.


It's a few extra steps, but the trade-off is that I get a vector drawing without dealing with the limitations of drawing with vectors (which isn't great, and you need to constantly fiddle with it to get close to what you want).


The final drawing was exported through Inkscape all on one layer at my usual resolution. However I did take some extra precautions to easily "future-proof" the drawing by splitting the vector layers in two (one that's above the counter, one that's under the counter) so that I can easily merge both the Blender renders and the vector layers together in-case I ever need a higher-res version

iu_1060284_9884366.webp


There still so much to talk about this drawing, as I'm only scratching the surface with it, but unfortunately I'm all out of space to talk about it. And also I don't think many people read these because of how long they are.


So for like the 5 that managed to read it all the way to the end. Did ya learn anything, or was I just blabbering-on again like I usually do?


Regardless, See you next drawing!


BBS Signature

~~I Can't Believe it's Not Rasters: Behind the Scenes~~


So, you wanna know my secrets behind this drawing I made? Well read closely, and you'll find how a few relatively simple tricks can go a long way.


>Characters

These are by far the easiest way to explain most of my Inkscape techniques I've used in this piece.


First, I do all my sketching in Krita. Just typical drawing stuff.

iu_1084785_9884366.png


Then I drew the lineart in Krita with black lines. If I have to draw multiple coloured lines I'd split those in separate layers, and you'll see why very soon.

iu_1084784_9884366.png


From there I export the layer as a png image and import that into Inkscape, and use Inkscape's "Trace Bitmap" tool to convert the lineart I made in Krita into a vector shape

iu_1084783_9884366.png

iu_1084786_9884366.webp

Doing it this way isn't as memory efficient as doing it manually, but it sure is a heck of a lot quicker and more enjoyable to do by comparison, so I'm willing to waste 0.03MB if it means I'll have a better drawing experience. It also looks a little more "natural" compared to doing it all in vectors. Just something about the imperfect lines just feels better, but that's just a me thing.


iu_1084787_9884366.webp

Colouring is up next, and it's as simple as picking-up the fill bucket and clicking on all the open spaces. The only exceptions are the pupils, the teeth, and the ears. Those are done manually. They're simple enough that it doesn't take me too long to make them.


iu_1084788_9884366.webp

The shading I do in Inkscape is pretty unique. I basically just plop a bunch of vectors in the spots where I want the light and shadows to be, with the neutral colour being the colour I used when filling everything in, and then I apply a blur filter over all of it to give it that smooth gradient, and to keep it from overflowing I use the neutral colour as my clipping mask, so nothing bleeds over the lines. Super simple stuff, but very effective, and I use that for a bunch of stuff in this piece!


>Trees

iu_1084789_9884366.png

Pretty much the same story as the characters to start. Just take the basic outline I did in Krita, and dump it in Inkscape where I tell it to trace it with vectors. Only difference is that I then take that same vector shape and I tell Inkscape to simplify it. This makes it go from having around 150000 little dots, to around 50000 little dots. It looks sloppier by comparison, but it doesn't matter when it comes to drawing nature stuff.


With that I also add a little gradient on there. Doesn't look like it'll do much at first, but when we add more things on top it'll start to really shine.


iu_1084790_9884366.png

First I added these little random lines that when blurred adds a bit of texture to the tree


iu_1084791_9884366.png

Next I added a bunch of little squiggles that I put at like 40% opacity. Pretty much made it look decent. Though, I'll need to practice drawing tree barks more often, because I feel like I'm missing one little crucial step to make it look more tree-like.


>Grass, and bushes

These ones were fun. I basically just made a few brush tips and used Inkscape's spray tool to scatter them everywhere

iu_1084792_9884366.png

The way the spray can work in Inkscape is that it makes a clone of what you've selected. You can't change the clone's colour without changing the original, but you can modify it further by adding filters on top and stretch it to whatever size, so you can really dial-in how each clone looks. On top of that clones take-up less space than a big mesh and individual vector shapes. Plus if you don't like how it looks you can just change the original to a different colour or shape, and all the clones will change along with it which saves a ton of time.


Definitely check-out this vid if you want something more visual. Inkscape in general just keeps impressing me with its many features.


I'm all out of image space, but if people are interested I can make a part 2 to this and explain a few more things like the background and water reflections.


See you probably next time, I don't know, I'm not your dad


BBS Signature